Pancakes with Blueberry Compote

It's been said here on the blog before: Patrick loves his buttermilk waffles. Here's his go to recipe. In the vein of not having waffles every weekend I sometimes convince him to have pancakes. Pancakes are a bit more challenging -- you know, with the whole wait until the pancake batter bubbles before you flip it.

Recently we received some frozen blueberries from a family friend and I knew that I wanted to incorporate them into breakfast. Specifically, I wanted to make a warm berry compote topping.

I told Patrick my intentions and then asked if he thought this would go better with waffles or pancakes. He chose pancakes... so that means no complaining about waiting for the pancakes to bubble before flipping!! There was still complaining.

Master flipper waiting for the pancakes to bubble (compote to the right).

Where are the bubbles?!

While Patrick was pancaking away I made the compote. Any buttermilk pancake recipe (or Bisquick mix) will be fine. We follow a recipe similar to this one found here. Read on for the super easy blueberry compote recipe which will take your pancakes to the next level!


Blueberry Compote from Food Network & Ellie Krieger
   Yield: 1/2 cup, 8 servings
Ingredients
2 cups frozen blueberries
3 tablespoons water
1/4 cup sugar
2 teaspoons lemon juice
   We halved this for just the two of us!

Directions
   Combine 1 cup of the blueberries, water, sugar and lemon juice in a small saucepan. Cook over a medium heat for about 10 minutes. Add the rest of the blueberries and cook for 8 minutes more, stirring frequently. Serve warm.
   Note: Patrick and I wanted more compote and less whole berry in this, so we started with 3/4 of the blueberries in the pan to simmer then added the final 1/4 of the berries at the end.


Served with a dollop of whipped cream! This just may be my new favorite way to have pancakes.

Any tips for how to make your pancakes bubble while they're cooking?! If so we'd love to hear it!

Simple Pork Chops with Spinach Salad and Crispy Onions

Today we're sharing a simple preparation for pork chops and a small confession: we have trouble cooking pork chops to perfection. There are too many variabilities! Bone-in, boneless, thin cut, thick cut -- oh, the options! And because of this we primarily prefer to cook pork tenderloins or porkloafs over the questionable pork chops. We've never given up on pork chops though and have shared quite a few recipes on the blog (ranch style, lowcountry smothered style, dijon style, and my mom's pork chop casserole). From our experience we've decided that bone-in thick pork chops work best for us because it's harder for us to overcook them.

Determined not to let pork chops fool us forever I bought them again a few weeks ago. I found a simple brine solution to prep them with and the rest is history! Below is the recipe and details for crispy onions that we topped our salad with!


Simple Pork Chops
from www.thekitchn.com and "Hot to Cook Tender & Juicy Pork Chops in the Oven"

Ingredients
   For the brine
3 cups cold water, divided
3 tablespoons coarse kosher salt (or 2 1/2 tablespoons table salt)
Optional flavorings: 2 smashed garlic cloves, 1/2 teaspoon black peppercorns, 1 bay leaf
   For the pork chops
2 to 4 pork chops — center cut, bone-on, 3/4-inch to 1-inch thick (about 1 pound each)
Olive oil
Salt
Pepper

Directions
   Brine the pork chops: If you have time, brining the pork for even a brief period adds flavor and ensures juiciness in the finished chop. Bring 1 cup of the water to a boil, add the salt and optional flavorings, and stir to dissolve the salt. Add 2 more cups of cold water to bring the temperature of the brine down to room temperature. Place the pork chops in a shallow dish and pour the brine over top. The brine should cover the chops — if not, add additional water and salt (1 cup water to 1 tablespoon salt) until the chops are submerged. Cover the dish and refrigerate for 30 minutes or up to 4 hours.
   Heat the oven and skillet: Position a rack in the middle of the oven and preheat to 400°F. Place the skillet in the oven to preheat as well.
   Season the pork chops: While the oven heats, prepare the pork chops. Remove the chops from the brine; if you didn't brine, remove the chops from their packaging. Pat dry with paper towels. Rub both sides with olive oil, then sprinkle with salt and pepper. Set the chops aside to warm while the oven finishes heating.
   Remove the skillet from the oven: Using oven mitts, carefully remove the hot skillet from the oven and set it over medium-high heat on the stovetop. Turn on a vent fan or open a window.
   Sear the pork chops: Lay the pork chops in the hot skillet. You should hear them immediately begin to sizzle. Sear until the undersides of the chops are seared golden, 3 minutes. The chops may start to smoke a little — that's ok. Turn down the heat if it becomes excessive.
   Flip the chops and transfer to the oven: Use tongs to flip the pork chops to the other side. Immediately transfer the skillet to the oven using oven mitts.
   Roast the chops until cooked through: Roast until the pork chops are cooked through and register 140°F to 145°F in the thickest part of the meat with an instant-read thermometer. Cooking time will be 6 to 10 minutes depending on the thickness of the chops, how cool they were at the start of cooking, and whether they were brined. Start checking the chops at 6 minutes and continue checking every minute or two until the chops are cooked through.
   Rest the chops: Transfer the cooked pork chops to a plate and pour any pan juices over the top (or reserve for making a pan sauce or gravy). Tent loosely with foil and let the chops rest for at least 5 minutes before serving.

While the pork chops were resting we assembled our salad: spinach leaves, sliced fresh strawberries, a drizzle of balsamic vinegar, and topped with crispy onions.
For the crispy onions I cut them into very thin slices then soaked them in buttermilk for 10-15 minutes. In a prep bowl I mixed all purpose flour with a savory maple seasoning (to pair with the pork) and then placed the drained onions into the flour mixture and tossed around until evenly coated. Then the onions went into a small pot with about 1/2" of oil to fry. Once golden promptly remove the onions.

We felt like we finally had a winner with these pork chops! And the crispy onions really made the evening a win-win for dinner!

Making pasta

One of the items on our registry that we were very excited about but did not receive as a wedding gift was the KitchenAid pasta roller attachment, which made it all the more fun to receive as a Christmas gift! Our previous experience with pasta making was somewhat frustrating as we borrowed a friend's manual roller and had no surface to properly mount it on, but we enjoyed the overall process and the final result was very tasty. Using the attachment is a breeze by comparison, and makes the whole experience that much more enjoyable.

The first step is to make the dough, which involves incorporating 1 egg per about 100 g flour (which is about one serving), and kneading the result until you have a nice ball of somewhat stretchy, non-sticky dough. We've done this several times and the process is pretty forgiving - you can always add flour/egg/water to reach the right consistency. The main trouble we have had is in trying to make 100% whole wheat pasta dough; the dough just doesn't seem to get stretchy enough and falls apart when you try to roll it, so we found having at least 1/3 white flour helps. Once the dough is done, you're supposed to cover it and let it rest at least 15 minutes, supposedly to make it easier to work with.


Once it's done resting, it's time to roll! This part is a lot of fun, as you can see. First you roll it through several times on the widest setting to knead it and get it in the right shape, and then you continue to roll it as thin as desired for whatever pasta you're making.


Once the pasta is in a thin sheet, it is ready to be transformed into whatever shaped pasta one desires. The pasta roller kit comes with a fettucine cutter and a spaghetti cutter, for which you just feed the pasta sheet through like with the roller and get perfectly cut strands.


In the spirit of more pasta-making fun and trying to get better at it, Whitney gave me a pasta-making class for my birthday! The class was offered by the owner of local business Melina's Fresh Pasta, which makes pasta to sell at farmers markets in the triangle. Carmella (aka Melina) showed us several methods for making pasta dough and shapes, which was pretty helpful. We've made pasta dough in the food processor before but it was nice to see it demonstrated, as I wasn't really doing it efficiently at all. We got to play with ravioli molds and learned how to make farfalle (bowtie pasta). The experience was fun and informative and a wonderful birthday present!

St Patrick's Day 2014

Top o' the morning to ya, lad! Today we're going back to our Irish meal from last Monday -- St. Patrick's Day! If I could've shared this with you beforehand I would have but this menu was literally planned the day of. Unfortunately I did not continue with making the second annual Perfect St. Patrick's Day cake. I would have if there had been a party but it's somewhat senseless to make a whole cake for just Patrick and myself. I did daydream longingly about that cake all day so it's definitely still in the "could be St. Patrick's Day" tradition box. As for 2014 we entered a Guinness & Beef Stew and Irish Brown Bread into the "could be St. Patrick's Day" tradition box. Maybe in 2015 I'll put them all together!!


You may have noticed I said this menu was literally planned the day of ... meaning I was putting together my weekly meal plan together Monday morning (St. Patrick's Day). I had one slight hiccup at the grocery store later that afternoon, and you might can guess it. They were sold out of Guinness Stout beer!! I snapped up the last pack of Guinness Extra Stout beer and didn't have any trouble with the recipes (both the stew and bread call for a bottle). Read below for the recipes!


Guinness & Beef Stew from People.com
    Serves 8 > I halved everything (the portions below are still for the full recipe)!
Ingredients
3 tbsp. canola oil, divided
¼ cup flour
2 lbs. boneless chuck roast, trimmed and cut into 1-inch cubes
1 tsp. salt, divided
5 cups chopped onion (about 3 onions)
1 tbsp. tomato paste
4 cups fat-free, lower-sodium beef broth
1 bottle (11.2 oz.) Guinness Stout
1 tbsp. raisins
1 tsp. caraway seeds
½ tsp. black pepper
1½ cups diagonally sliced carrots (about ½-inch thick)
1½ cups diagonally sliced parsnips (about ½-inch thick)
1 cup cubed, peeled turnips (½-inch cubes)
2 tbsp. finely chopped fresh flat-leaf parsley

Directions
   Heat a Dutch oven over medium-high heat. Add 1½ tbsp. oil to pan, swirl to coat.
   Place flour in a shallow dish. Sprinkle beef with ½ tsp. salt; dredge beef in flour.
   Add half of beef to pan and cook 5 minutes, turning beef to brown on all sides. Remove beef from pan with slotted spoon. Repeat with remaining oil and beef.
   Add onion to pan and cook 5 minutes or until tender, stirring occasionally. Stir in tomato paste and cook 1 minute, stirring frequently.
   Stir in broth and beer, scraping pan to loosen browned bits. Return meat to pan, then stir in remaining ½ tsp. salt, raisins, caraway seeds and pepper. Bring to a boil, cover, reduce heat and simmer 1 hour, stirring occasionally.
   Uncover and bring back to a boil. Cook for 50 minutes, stirring occasionally.
   Add carrot, parsnip and turnip. Cover, reduce heat to low and simmer 30 minutes, stirring occasionally. Uncover and bring to a boil; cook until vegetables are tender, about 10 minutes. Sprinkle with parsley.

We felt that the stew did not need to be returned to boil for 50 minutes after the initial hour of simmering. We added the vegetables after an hour but continued to let the stew simmer for another hour and everything turned out fine.


Irish Brown Bread from Happy Money Saver blog
    Total time: 1 hour 40 mins
Ingredients
1 cup old fashioned oats
2¼ cups whole wheat flour
½ cup dark brown sugar
2¼ tsp. baking soda
1 tsp. baking powder
½ tsp. fine sea salt
⅓ cup melted butter
1 tsp. vanilla extract
1 cup buttermilk
1 11.2 oz. bottle Guinness beer
   (Halved everything here too; recipe still denotes full portion)
Instructions
   Preheat oven to 425 degrees. Grease loaf pans or bowl.
   Mix all of the dry ingredients in one bowl and set aside.
   In another bowl mix the butter, vanilla, buttermilk and beer.
   Next take the beer mixture and pour it into the dry ingredients. Gently stir until you get a well blended batter. This will not look like a typical bread dough, but more of a batter.
   Pour batter into prepared pan and sprinkle with a handful of additional oats.
   Bake at 425 degrees for 30 minutes. After 30 minutes, reduce the heat to 400 degrees and bake for an additional 30 minutes. Turn the oven off but keep the bread inside. Open the oven and let bread finish cooling on the rack inside for another 30 minutes. Remove and let bread finish cooling. Serve with stews, chili’s, and chowders. Or serve on it’s own with a slather of butter and honey.


We took a somewhat impromptu trip to visit our friends in DC for the holiday weekend. Thanks DC friends for having us! Here we are in our green!


What traditions do you have for St. Patrick's Day?!

Spicy Mushroom Asian Soup

It happened again! I was watching ABC's The Chew and one of the chefs made something I had to try! I've made something from all the chefs now! I've made...
   Carla Hall's Seared Tuna Sandwich with Ginger Lime Slaw
   Clinton Kelly's Spinach Artichoke Dip
   Daphne Oz's Cauliflower Alfredo
   Michael Symon's Cheesecake with Pretzel Crust
and last but not least Mario Batali's Bananas Foster Crepes

This time it was back to Daphne Oz. It was a spicy Asian soup. The soup had all sorts of nutritional benefits to get you out of the winter blues. Mushrooms provide you with Vitamin D which makes up for a lack of exposure to sunlight; ginger has anti-inflammatory effects that help alleviate winter joint pain as well as aids in nutrient absorption; spinach has iron and Vitamin K which is great for bone health. With all these wonderful benefits I knew this soup would be a win-win-win... too many wins to count!


Daphne Oz's Spicy Mushroom & Noodle Soup from The Chew
   Time 30 min | Serves 4
Ingredients
Oil
1 medium onion, finely diced
2 Garlic cloves, minced
1 tablespoon ginger, grated
1 Red chili, thinly sliced
1 tablespoon low-sodium soy sauce
2 teaspoon sesame oil
1/2 cup dried shitake mushrooms
2 quarts water
2 cups spinach
1 package rice vermicelli noodles (cooked to package instructions)

Directions
   Heat a medium sauce pot with a few tablespoons of oil. Add the onion and sweat over medium heat until soft. Add the garlic, ginger and chili and cook for 2-3 more minutes until fragrant and chili is slightly soft.
   Add the sesame oil, soy sauce, dried mushrooms and water. Bring to a boil and reduce to a simmer. Cook for 10 minutes or until mushrooms are rehydrated and flavors have infused the water. Strain out mushrooms, thinly slice, and then return to the broth. Adjust seasoning to taste. Add the spinach and remove from heat.
   Divide the rice noodles between heat proof soup bowls. Pour some simmering broth into eat bowl to cover noodles.
   Serve soup warm.

Patrick and I both enjoyed this and agreed we should have it again! Instead of water I used our homemade chicken stock which added another layer of flavor. One other thing we did differently was the greens. Earlier in the week we made Patrick's favorite stir fry and had leftover bok choy. I added the heartier light green parts of the bok choy to the soup when I added the onions. I also added in some carrots here too. Finally the bok choy leafy greens replaced the spinach.

Soba noodles throw together

We're at it again with utilizing pantry supplies! This time it was soba noodles and sweet potatoes!

These posts are never much for a solid recipe but, hopefully, more inspiration to go into your pantry / freezer / fridge and make good use of those groceries you've already purchased! Literally everything in this meal came from something we already had. Here, I'll prove it to you:

Soba noodles - I buy something similar to this from Harris Teeter; in the package are 3 separate bundles of soba noodles which I find perfect for 2 servings. Therefore 1 package = 3 meals for us.
Chicken breast - Patrick and I stock up on frozen individually packaged chicken breasts from Costco so we usually always have these in the freezer
Asian dressing - This is one of the few (maybe the only) prepared dressings we keep on hand since we typically dress our salads from our stash of oils and vinegars. I find this is great to have because it's versatile enough that it can be used as a marinade. It's officially Ken's Lite Asian Sesame with Ginger & Soy dressing.
Sweet potatoes - Think we used the last sweet potato from our CSA here (they keep so long!!)
Edamame - I usually don't have this in the freezer (I like to buy the frozen shelled edamame to toss into Asian dishes for the extra nutrients) but on this occasion I had a bag which I had bought for a previous dish and forgot to use it then
Arugula - Used half a bag for a previous recipe in the week and tossed the rest into the dish (certainly could've done without the arugula)
Soy sauce, rice vinegar, mirin, sesame oil, sriracha - All things we keep on hand


Then once you know what you're working with, figure out how to put it all together and assemble!

For this throw together, I thawed my chicken breast earlier in the day and then let it marinate in the dressing for an hour or so while the rest of the items were prepped. I knew the soba noodles and edamame would cook fast (and that I could also boil them in the same pot simultaneously). So baking the sweet potatoes and chicken would be the first priority.

I diced the sweet potatoes into small bite-size chunks so that they would cook faster and then I could just toss them into the final dish without any trouble. The sweet potatoes were drizzled with extra virgin olive oil and sprinkled with salt and pepper before putting them into a preheated 400F oven. After 15 minutes, I lowered the oven to 375F, gave the sweet potatoes a stir, and added the chicken breast to the side of the pan to cook with the sweet potatoes. Then they finished baking in about 20-25 minutes (we always have a kitchen thermometer handy to check internal temps).

While the sweet potatoes and chicken were baking, I prepped a quick dressing / light sauce to toss the whole dish with (which I adapted from here). It was about 2 tbsp soy sauce, 2 tbsp rice vinegar, 1 tbsp mirin, 1 tbsp sesame oil, dash of sriracha, and dash of ground ginger.

Meanwhile in a pot of boiling water cook edamame and soba noodles according to package directions. I think the edamame called for 5 minutes and the soba noodles for 3 minutes so the edamame went in the pot first and then after 2 minutes the soba noodles followed!

Finally toss everything together: sweet potatoes, baked chicken breast (dice it up first), drained soba noodles and edamame, dressing, and the fresh arugula.

Hope this empowers you to have a "throw together" meal as Patrick and I so lovingly call them. And remember not all throw together meals are a hit! And no two throw together meals are ever the same...

Mini Cheesecakes

When Patrick and I were registering for the wedding we had a fairly good idea of what items we wanted to add to or upgrade in our kitchen. We researched these items and didn't have too much trouble selecting them. Finalizing our dishes (both formal and casual) did take a bit of back and forth but once decided we didn't look back!

Today we're featuring a "for fun" registry item -- mini springform pans! Crate and Barrel's Kaiser Nonstick mini springform pan to be exact (just 4.5" in diameter). This was a request from Patrick; in his words, it was so he could perfect cheesecakes without having to make large ones.


Imagine Patrick's excitement when we received these! Off I set to make us some mini cheesecakes. I ran across a perfect recipe from Kraft. It has a base recipe for regular cheesecake and then several "stir-in" flavors to personalize them. For our first venture into the world of mini cheesecakes we made regular and mocha.


Mini Cheesecakes from Kraft
   prep 20 min | total 5 hr 5 min | makes 4 mini cheesecakes
Ingredients
1 cup graham cracker crumbs
3 Tbsp sugar
3 Tbsp butter or margarine, melted
3 pkg (8 oz. each) cream cheese, softened
¾ cup sugar
1 tsp vanilla
3 eggs

Directions
   Preheat oven to 300°F.
   Mix cracker crumbs, 3 Tbsp. sugar and the butter; press scant 1/3 cup crumb mixture onto bottom of each of four mini (4-1/2-inch) springform pans. Bake 7 min.
   Beat cream cheese, 3/4 cup sugar and the vanilla with electric mixer on medium speed until well blended. Add eggs, one at a time, mixing on low speed after each addition just until blended. Pour one-fourth of the batter (about 1 cup) into each of four bowls. If desired, add one of the Stir-In Ideas to each bowl of batter. Pour over crusts. Place pans on baking sheet.
   Bake 40 to 45 min. or until centers are almost set. Run knife or metal spatula around rims of pans to loosen cakes; cool before removing rims. Refrigerate at least 4 hours.

Stir-in Ideas: For each one-fourth portion of batter, stir in one of the following before pouring batter over crust and baking as directed.
   Apple Pie: Stir in 1/8 tsp. ground cinnamon. Top baked cheesecake with combined 1/2 cup warmed apple pie filling and 1/2 tsp. brown sugar. 
   Cherry: Bake mini cheesecake as directed without Stir-Ins. Just before serving, top with 1/3 cup cherry pie filling.
   Chocolate Chunk: Stir in 1 oz. Semi-Sweet Baking Chocolate, chopped. 
   Chocolate Royale: Stir in 2 oz. Semi-Sweet Baking Chocolate, melted.
   Citrus: Stir in 1 tsp. lemon, orange or lime juice; 1 tsp. flour and 1/4 tsp. grated lemon, orange or lime peel.
   Cookies and Cream: Stir in 1/4 cup chopped oreo Cookies.  
   Mocha: Mix 1 tsp. Instant Coffee granules with 2 tsp. hot water. Stir into batter along with 2 oz. Semi-Sweet Baking Chocolate, melted. 
   New York: Stir in 1/4 cup Sour Cream and 1 Tbsp. flour.
   Peanut Butter: Stir in 2 Tbsp. peanut butter and 1 Tbsp. milk. 
   S'Mores: Stir in 3 Tbsp. milk chocolate chips. Top baked cheesecake with 1/4 cup Miniature Marshmallows and 1 Tbsp. broken Honey Grahams.

We each had a quarter slice of both flavors! We served with a dollop of whipped cream.
Next I imagine we'll try peanut butter or s'mores. What would be your favorite stir-in?!

First Day of Spring

The first day of spring is finally upon us! Hopefully that means all this wintry weather is behind us. We've had so much extreme winter weather (as far as Southerners are concerned) that I lost count of how many times we've had snow / ice and the roads had to be salted. Spring is welcomed with open arms!

I have somehow deemed this season transition day as appropriate to share a few pictures of the snow we had and how I make my snow cream!

So here I am in the snow!
(It's not really snowing)
I suited up in all my snow gear to get some snow. This was from the mid-February snow. You remember, the one that caused the Triangle Snowpocalypse and motorists were stranded on roads throughout the area. Patrick and I were both fortunate to be home safe and sound... and crossing our fingers the power wouldn't go out (it didn't, thankfully)!

This was a really great "snow cream" snow. It was powder-y and not too ice-y.
Scooping snow into my bowl.
Patrick is unsure what exactly snow cream is and doesn't understand the delicacy that it really is. He did try the snow cream but it was too foreign to him. Maybe you have to grow up with snow cream to understand its rarity and that you can't miss an opportunity to have snow cream (because it doesn't come around too often)!

I'm sure everyone who makes snow cream has a different recipe. Is the base made of eggs, cream, or sweetened condensed milk?? Do you add additional sweeteners or flavors?? All variables to consider for your recipe. I take the easy way out... sweetened condensed milk! I buy a can of this if there's snow in the forecast when I make the grocery store run for milk and bread. This one ingredient snow cream keeps everything extra simple. I do, however, add in a bit of vanilla extract. It doesn't require much sweetened condensed milk; add just until desired consistency is reached.

2014 Snow Cream
The other magical feature of snow cream is that it must be consumed as soon as it is made! Freezing it alters the texture a bit.

View out the window
Here's wishing warmer days your way and no more snow until next year!

I'm so hopeful it'll be warm that I sowed our first boxes of lettuce (one mixed greens box and then arugula) last week. We'll have to see if they sprout in the next few weeks or if the cold, ice-y rain at the beginning of the week claimed them.

Happy spring! What are you looking forward to most?

Smitten Kitchen's Whole wheat raspberry ricotta scones

I've mentioned before that using up ricotta from a savory pasta dish can be complicated. However it looks like I've figured out the key -- using it for brunch! I've tried two different ricotta pancake recipes in the past month and now have moved on to scones! I wonder if I'm subconsciously planning savory pasta dishes with ricotta so that I can try new brunch ricotta dishes.

This recipe is from Smitten Kitchen and also features whole wheat flour. I've tried making a scone before. It didn't turn out too well. But I was ready to try again since this recipe was so different than the other -- it has ricotta! I had no trouble making this and they turned out delicious.

I prepared the full batch. However I baked half on a Friday and placed the remainder in the fridge and baked the following morning per Smitten Kitchen's recommendation. She said they are best fresh. I still had some leftover that I ate a few days after they were baked and I still thought they were quite tasty. The recipe is below and straight from her website; I added my notes in italics.


Smitten Kitchen's Whole Wheat Raspberry Ricotta Scones
Ingredients
1 cup (120 grams) whole wheat flour
1 cup (125 grams) all-purpose flour
1 tablespoon baking powder, preferably aluminum-free
1/4 cup (50 grams) granulated sugar
1/2 teaspoon table salt
6 tablespoons (85 grams) cold unsalted butter
1 cup (136 grams or 4 3/4 ounces) fresh raspberries I used frozen
3/4 cup (189 grams) whole milk ricotta
1/3 cup (79 ml) heavy cream

Directions
   "Preheat oven to 425 degrees. Line a large baking sheet with parchment paper. In the bottom of a large, wide-ish bowl, whisk flours, baking powder, sugar and salt together.
   With a pastry blender: Add the butter (no need to chop it first) and use the blender to both cut the butter into the flour mixture until the biggest pieces are the size of small peas. Toss in raspberries and use the blender again to break them into halves and quarter berry sized chunks.
   Without a pastry blender: Cut the butter into small pieces with a knife and work the butter into the flour mixture with your fingertips until the mixture resembles a coarse meal. Roughly chop the raspberries on a cutting board and stir them into the butter-flour mixture.
   Both methods: Add the ricotta and heavy cream together and stir them in to form a dough with a flexible spatula.Using your hands, gently knead dough into an even mass, right in the bottom of the bowl. Don’t fret if the raspberries get muddled and smudge up the dough. This is a pretty thing.
I used the food processor for this initial step.
   With as few movements as possible, transfer the dough to a well-floured counter, flour the top of the dough and pat it into a 7-inch square about 1-inch tall. With a large knife, divide the dough into 9 even squares. Transfer the scones to prepared baking sheet with a spatula. Bake the scones for about 15 minutes, until lightly golden at the edges. Cool in pan for a minute, then transfer to a cooling rack. It’s best to cool them about halfway before eating them, so they can set a bit more. I know, way to be a big meanie, right?

Do ahead: Scones are always best the day they are baked. However, if you wish to get a lead on them, you can make them, arrange them on your parchment-lined sheet and freeze them. If you’re prepping just one day in advance, cover the tray with plastic wrap and bake them the day you need them. If you’re preparing them more than one day in advance, once they are frozen, transfer them to a freezer bag or container. Bring them back to a parchment-lined sheet when you’re ready to bake them. No need to defrost the froze, unbaked scones, just add 2 to 3 minutes to your baking time."

This will definitely be made again! The first batch I made I brought with me to a crafting rendezvous at Marianne's house then the other half was for Patrick and I myself. Patrick and I baked the scones in the morning and then took off to High Point that day for some furniture shopping. Here we are at the Furnitureland South showroom. The scones definitely kept us fueled up!

The 8:26pm Pasta Dish

For my birthday Patrick let me make whatever I wanted for dinner! I decided it'd be fun to try making homemade whole wheat pasta and throw in all my favorite things to the sauce -- pancetta, mushrooms, and shrimp! My birthday was on Monday this year so that meant after dinner I was able to watch my favorite show -- The Bachelor! I was even able to spend the day with my favorite person because it was President's Day and Patrick had the day off. It couldn't have been a better day!


The 8:26pm Pasta Dish
Ingredients that I Used
   Unfortunately this is a "throw together" dish and I don't have precise measurements (everything listed below is very approximate)
Pancetta
Shrimp (~1/2 lb; if frozen have them thawed)
1 medium onion, chopped
Mushrooms (roughly 1 1/2 cups)
2 cloves garlic, crushed
Zest of 1 lemon
Red pepper flakes
Extra virgin olive oil
1/4 cup white wine
1/4 cup half-and-half
1/2 cup grated romano cheese
salt and pepper to taste
3/4 lb pasta

Directions
   Prepare shrimp. Marinade the shrimp in 2 tablespoons extra virgin olive oil, lemon zest, and a dash of red pepper flakes. Set aside until ready to add to the sauce.
   Warm 1 tbsp evoo in a large skillet over medium heat. Add pancetta. Once the fat has rendered add the chopped onion and mushrooms; season with salt and pepper. Saute for about 10 minutes or until mushrooms have released their liquid. Add crushed garlic and stir. Cook for another minute or so / until the garlic is fragrant. Add a dash of wine to the pan. Push aside veggies and then add shrimp in an even layer to the center. After 2 minutes or when shrimp are becoming pink flip to the other side for 1 more minute. Remove shrimp to a plate.
   Add 1/4 cup wine and simmer for 2-3 minutes. Then add 1/4 cup half and half or a bit more, make sure the bottom of the pan is covered. Finally add 1/2 cup grated romano cheese to finish the sauce.
   Meanwhile cook pasta. Add pasta directly to pan. If needed add pasta water to loosen the sauce. (We needed a ladle full of pasta water). Plate and add shrimp to the pasta; serve immediately.

Patrick even set the table with our formal settings! The wine was a chardonnay from the Joel Gott winery which was one served at our wedding.

Why 8:26pm pasta? That's what time I arrived to the world! In the picture above, at that very moment, I was now officially twenty seven years old. (Sometimes we have late dinners.)

Special thanks to Patrick for making my birthday so wonderful! There's no one else I'd rather have by my side to welcome the coming years!

Luxurious Cinnamon Rolls

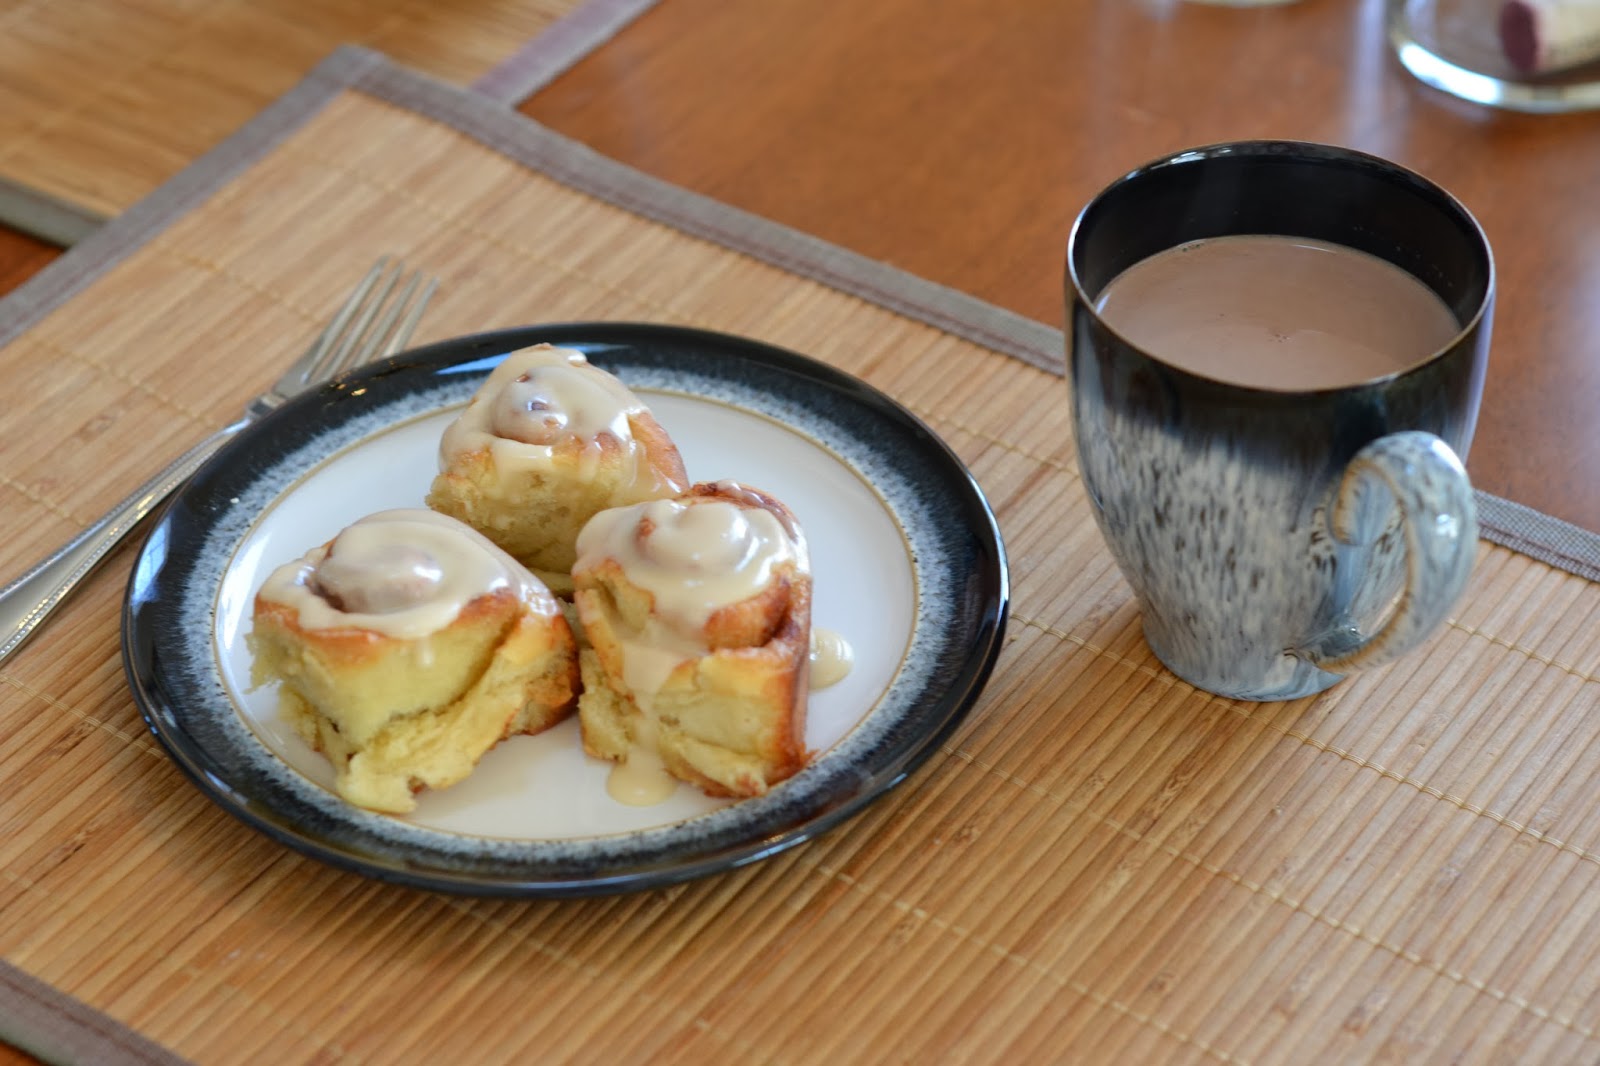
Whitney's birthday had the nice coincidence of falling on President's Day this year, which happens to be a work holiday for me. With my ample holiday free time, Whitney requested that I make this cinnamon roll recipe for breakfast. Given how flustered some of these gift-giving occasions can make me, I was happy to oblige.

This is the same basic Pioneer Woman recipe that we used for the pumpkin cinnamon rolls. Remembering how long those took to make from scratch, I decided to make the dough the night before so that we would hopefully eat breakfast by noon. In that respect we were successful, but these still took a long time even when the dough had risen once, as I still had to make the filling, roll out the dough, put the filling in, roll them up, cut them, let them rise again, and then bake them. We were a little hungry when they were done!

This particular variant has a maple-flavored icing. Whitney enjoyed it, but I would say I'm more a fan of a standard cream cheese icing for cinnamon rolls. I prepared us some fake mochas (coffee, hot milk, cocoa) and we had a wonderful breakfast.


Maybe if I wake up at 7am next time they'll be ready in time for breakfast!


Salsa Fresca & Huevos Rancheros

I made this Mexican egg breakfast dish shortly after the Super Bowl. Why, you ask? Because we had extra black beans leftover from a turkey chili. I had soaked a combination of black beans and pinto beans for a chili but I'm not very good at anticipating how many beans I will need after they've soaked. After the soak we realized there were too many beans (per usual). So half of the beans went into the chili and the other half went into the fridge for a later date.

Then I realized huevos rancheros with salsa fresca would be delightful!
   Huevos rancheros is composed of fried eggs served with fried corn tortillas, a tomato-chili sauce; beans, rice, or guacamole are common accompaniments.
   Salsa fresca, also known as pico de gallo, is a fresh, uncooked condiment composed of tomato, onion, and chili peppers; avocado, lime juice, or cilantro may also be added.


I picked up things for the salsa fresca at the store during the week (Patrick had gotten an avocado for the Super Bowl too) and we were all set when the weekend rolled around!

Here's what we did!

For the Salsa Fresca
Combine in a food processor:
   3 roma tomatoes, quartered
   2 jalapenos, seeded and diced
   half red onion, quartered
   2 cloves garlic
   juice of half a lime
   salt and pepper


Process until desired consistency is reached. Like so...
We got it fairly pureed but still visible chunks were present in the salsa.


For the Beans
   Saute one diced medium onion in a medium saucepan with extra virgin olive oil until translucent. Add 2 cups chicken stock and 1 cup soaked beans, bring to a boil and then simmer for 10-15 minutes or until beans are tender. 

While the beans are simmering prepare eggs (we cooked to over-medium).

To Assemble the Huevos Rancheros
   Begin the dish with a base of the black beans. Then add a sprinkle of cheddar cheese and the fried egg. Top with sliced avocado and the salsa fresca. 
   I opted to omit the corn tortillas because I wasn't sure that we'd use a whole bag of tortillas and didn't want to waste them. Patrick still wanted a bit of crunch and added Beanitos chips to his dish.


The surplus salsa kept in the fridge for chips the following week.
I can't wait to have a "salsa" garden -- roma tomatoes, jalapenos, and onions!

Easy Clam Chowder

For some odd reason I had a craving for clam chowder a few weeks ago. I'm not really even sure why. I searched through our cookbooks and around the Internet for something fairly simply but something just wasn't quite right about anything I came across so I stitched together the pieces of recipes I liked and put this together. Who knew that I was making Patrick's first pot of clam chowder! As you can imagine he was a little apprehensive at first but by the end of the bowl he had come around to it and approved!

Easy Clam Chowder served with toast-y cheese-y croutons.
Easy Clam Chowder
   Serves 4
Ingredients
1 lb yukon gold potatoes, in a small dice
8 oz bottle of clam juice
10 oz can of clams, drained and juices reserved
1 onion, diced
1-2 slices of bacon, diced
2 cups stock
1 tbsp flour
1/4 tsp Old bay seasoning
1/2 cup half and half
2 tbsp extra virgin olive oil
Directions
In a medium pot warm 1 tbsp extra virgin olive oil and fry [1-2 slices, chopped] bacon on medium heat. Once bacon is crispy add the second tbsp of extra virgin olive oil and then the [one, diced] onion. Saute until onion is translucent (4-5 min) then stir in [1 tbsp] flour. Continue stirring for 1 minute and then slowly whisk in [2 cups] stock, clam juice, and reserved clam juice from clams. Add [1 lb, diced] potatoes and bring to a boil. Simmer for 10 minutes or until potatoes are tender. The smaller your dice, the quicker the potatoes will become tender.
   Once the potatoes are tender blend about half the soup. We used the immersion blender; you could remove about half the soup to a blender and blend; or you could take a potato masher and mash a bit throughout the soup. This starch from the broken potatoes will further thicken your soup. If you want a thinner soup with more whole potatoes then blend less (or not at all). You could also blend the whole soup if you didn't want potato chunks.
   Finally add the [1/2 cup] half and half and the clams to the soup. Serve immediately.

Next time I make this I will add celery and carrots with the onions.
For the croutons, we had whole wheat hoagies left over. I diced them and then tossed with olive oil, Italian seasonings, and parmesan and then baked in the toaster until cheese was melted.

Do you have a favorite clam chowder recipe??

Orzo with Caramelized Fall Vegetables & Ginger

One thing I asked for my birthday was that Patrick put together the "meal plan" for the week! This can be quite the task so it was nice to have a small break - thanks Patrick! Here's what he put together:

Tues potato soup and cornbread (use frozen ham)
Wed fresh fish (whatever looks good, salmon works) with side salad
Thurs pork schnitzel with side salad (use frozen pork)
Fri sweet potato veggie orzo, something like this
Sat breakfast buttermilk waffles
   dinner out
Sun breakfast baked oatmeal
   dinner Baked chicken breast, couscous

As you can see Patrick left some details out (ie, what should go on the side salad and what marinade/seasonings should be used for the baked chicken breast Sunday).

Before Patrick set off on making the meal plan he asked what we needed to use up in the freezer/pantry. We had some sweet potatoes that I requested he use. So he decided that "sweet potato veggie orzo" was a good idea... like I said -- missing some details. But then he offered a recipe. Here's the "something like this" as he put it.

Orzo with Caramelized Fall Vegetables & Ginger from thekitchn.com
   Serves 4 as main dish or 6 as side dish
Ingredients
1/2 pound orzo pasta
2-3 tbsp grapeseed, peanut, or vegetable oil
1 large sweet potato (about 3/4 pound)
2 medium onions (about 1 pound), finely diced
4 cloves garlic, minced
3-inch piece fresh ginger — peeled and grated, about 1 tablespoon
6 ounces shiitake mushrooms, stems removed and caps diced
1 tablespoon balsamic vinegar
2 tablespoons soy sauce
3 big leaves chard or kale, stalks removed and leaves finely chopped — about 2 cups
Salt
Freshly ground black pepper
Parmesan, optional

Directions
   Heat a large pot of water to boiling and salt it generously. Cook the orzo until barely al dente — about 6 to 7 minutes. Drain and toss with a generous drizzle of oil so that the grains of orzo are lightly coated with oil. Set aside.
   Peel the sweet potato and dice it finely into cubes about 1/4 to 1/2 inch to a side. Heat a large sauté or frying pan (the largest you have — you want plenty of room and hot surface) over high heat. Drizzle in a little grapeseed or vegetable oil (not olive oil — you want an oil with a high smoke point) and heat until very hot. Add the sweet potatoes and arrange them in one layer. Cook them over high heat until they are beginning to caramelize and turn brown — about 4 minutes. Flip them over and cook for another 3 minutes or so.
   Turn the heat down to medium and push the sweet potatoes up in a pile against one side of the pan. Add the diced onions to the center of the pan and sprinkle them lightly with salt. Cook, stirring occasionally, until the onions are beginning to turn brown. Add the minced garlic and grated ginger and stir them into the onions. Push the onions off to the side of the pan, next to the sweet potatoes, where they will continue to caramelize.
   Add the diced shiitake mushrooms to the hot center of the pan and cook them for 4 minutes without turning them. Then flip and stir them and cook for another 4 minutes.
   At this point everything should be getting well-cooked; the onions should be quite dark brown and the garlic should be golden and soft. The potatoes should be softening.
   Whisk together the vinegar, soy sauce, and 2 tablespoons of oil. Pour this into the pan with the vegetables and mix everything together, scraping the bottom as you go. Cook all the elements together for about 3 minutes on medium heat. Then turn the heat up to high, as high as it will go.
   Add the orzo gradually, shaking in a cup at a time, and stirring and scraping constantly. Cook the orzo over high heat with the rest of the vegetables for about 5 minutes, letting the orzo get browned on the bottom of the pan, then scraping it up. You are developing a little more color and flavor on the pasta, and helping all the flavors combine.
   Finally, toss the chopped greens into the mix and cook for 1 more minute or until the greens are barely wilted. Turn off the heat and taste. Add salt and pepper if needed. Serve hot, with shavings of Parmesan if desired.


I found that the high heat wasn't necessary when sauteing the vegetables. We really enjoyed the dish; has a lot of the savory Asian flavors we like!

Jalapeno Poppers

Are you ready for some March Madness??? These jalapeno poppers will be the perfect addition to a viewing party! They are adapted from this Skinny Taste blog recipe.

If you know me then you might be wondering why I made these! The answer, of course, is they were a request from Patrick and I like to be as obliging as possible when it comes to requests my loving husband makes even if I am less than enthusiastic about said request.

I did attempt to eat one of these and they were tolerable. I made half the poppers spicy by leaving in most of the seeds and membranes and then the other half were stripped of all seeds and membranes (these were ones I could tolerate). Before I made these I asked Patrick how spicy he wanted them and he said some seeds and membrane would be okay... buttt not all of the spicy ones got eaten so be ware!


Beer Battered Jalapeno Poppers
   Ingredients
6 jalapenos* 
4 oz cream cheese, room temperature
1/3 c shredded cheese
garlic powder
bread crumbs
paprika
2 eggs
splash of beer
*Be very careful when handling the jalapenos. Make sure to wash your hands immediately handling them and not to touch your face before doing so otherwise there may be some tears shed.

   Directions
Prep the jalapenos.
   Slice the jalapenos in half. For spicier poppers, leave in seeds and membranes. For the least spicy poppers, remove all seeds and membranes. To distinguish between spicy and not spicy poppers, I removed the stems from non spicy poppers.
Make the filling.
   Mix together cream cheese, shredded cheese, and a dash of garlic powder (1/2 tsp or so). Smear on the halved jalapenos.
Assemble dipping station.
   In a shallow dish, combine the eggs with a splash of beer. In another dish mix the bread crumbs with a dash of paprika.
Bake.
   Bake in a preheated 350F oven for 20-25 minutes. Serve immediately.

Happy March Madness!! Are you ready to fill out some brackets?!

Six Months Anniversary Dinner

Last month, just a few days before Valentine's Day, we celebrated our six month anniversary! We had a very exciting Valentine's date planned so we moved our traditional Valentine's meal of manicotti to our anniversary dinner night.

We've been venturing into the homemade pasta world recently (see here here and here) so we decided to make an adapted lasagna roll-up (with homemade noodles) that would somewhat mimic manicotti. This turned out okay but not amazing so we'll share a recipe once it turns out a little better. I think what went wrong was our placement of the filling when rolling it up; we placed the filling only on one half of the noodle which meant after rolling it up there were a few rotations of just the noodle and that was a bit heavy. Next time we will slather the whole noodle with filling before rolling it up!


For dessert I chose a chocolate shortcake with strawberries in honor of Patrick's very first Valentine's gift to me. Way back in 2010 he had an Edible Arrangement sent to me with a bear stuffed animal. His accompanying note read "You are berry special to me." So I couldn't resist making him a berry special dessert as we celebrated our first Valentine's as a married couple!


Chocolate Strawberry Shortcakes from Taste of Home
   Prep 20 min | Bake 10 min | Serves 4
Ingredients
1/2 quart fresh strawberries, sliced
1/3 cup sugar, divided
1 cups all-purpose flour
2 tbsp baking cocoa
1/4 tsp baking soda
1 tsps baking powder
1/2 tsp salt
1/4 cup cold unsalted butter
1/3 cup + 1 tbsp miniature semisweet chocolate ships, divided
~1/3 c half-and-half cream
1 egg white, lightly beaten
1 1/2 tsps sugar
1/4 pint heavy whipping cream
1 1/4 tbsps confectioners’ sugar
1/3 c hot fudge ice cream topping, optional
10 fresh strawberries or grated chocolate for garnish, optional

Directions
   Combine strawberries and 2 tablespoons sugar; refrigerate if desired. In a large bowl, combine the flour, cocoa, baking soda, baking powder, salt and remaining sugar. Cut in butter and 1/3 cup chips until crumbly. Add half-and-half and stir until just moistened.
   Divide dough into 4 patties, about 3/4-in. thick. Place on parchment paper-lined baking sheets. Brush with egg white; sprinkle with coarse sugar and remaining chips.
   Bake at 450° for 13 minutes or until toothpick inserted near the center comes out clean. Cool. Meanwhile, in a small bowl, beat whipping cream and confectioners' sugar until stiff peaks form. Refrigerate.
   To assemble, split shortcakes in half. Place cake bottoms on dessert plates. Top with about two-thirds of the strawberries, whipped cream and fudge topping. Replace shortcake tops; top with remaining berries, cream and topping. Garnish with additional berries and chocolate if desired.


We celebrated Valentine's in downtown Durham! We started the evening at King's Daughters Inn for a wine and canape paired tasting. Then we went to the highly anticipated Book of Mormon musical at DPAC. Finally the evening concluded at Mateo's Tapas restaurant. It couldn't have been a better evening!


Bananas Foster Crepes

We've tackled risotto and homemade pasta... in my opinion, these are two scary things for the home chef to tackle for the first time. With our confidence from those successful ventures we've now tackled crepes! Whenever Patrick and I go out to brunch he usually orders sweet dishes and I'm usually ordering something a bit more savory. One of the dishes Patrick really loves is crepes with fresh fruit.

Since I make all things from ABC's The Chew these days, it must've been no coincidence that Mario Batali made crepes one day! He must've known that Patrick loves them. With this encouragement off I went to the store for crepes ingredients and a special Saturday morning breakfast.

Mario Batali's Bananas Foster Crepes
Mario Batali's Bananas Foster Crepes from ABC's The Chew
   time 30 min | serves 6
Ingredients
   For the Crepes
1 1/2 cups All-Purpose Flour
4 Eggs
2 cups Whole Milk
3 tablespoons Extra Virgin Olive Oil
pinch of Salt
Butter (to oil crepe pan)
   For the Banana Foster
1/2 stick Butter
1/2 cup Dark Brown Sugar
1 stick Cinnamon
1/4 teaspoon freshly grated Nutmeg
2 teaspoons Vanilla Extract
4 Bananas (diced)
1/3 cup Dark Rum
Salt (to taste)
   For the Melted Peanut Butter 
1 cup All Natural Peanut Butter
Water (plus more as needed)
Salt (to taste)
Confectioners Sugar (to garnish)
**We halved everything!

Directions
For the Crepes: Place the flour in a mixing bowl. Add the eggs one at a time, whisking to combine. Add the milk bit by bit and whisk to combine until all the milk is incorporated. Whisk in the extra virgin olive oil. Season with salt and allow the batter to stand for 10 minutes to an hour.
   Heat a 6-inch nonstick pan over high heat until hot and add a dab of butter. Turn the heat down to medium and pour 1 1/2 tablespoons of batter into the pan and swirl to coat. Cook until pale golden on the bottom, about 1 minute. Flip and cook just 5 or 10 seconds on the second side. Remove and set aside. Continue the process until all the batter has been used. Keep warm on a plate and cover with a warm towel.


For the Bananas Foster: Melt butter over medium heat in a large non-stick skillet. Add the brown sugar, spices and vanilla and cook until caramelized, stirring occasionally. Toss in the bananas and coat with the sauce. Add the rum and flambe until flames extinguish.


For the Melted Peanut Butter: Heat peanut butter in a small sauce pan over low adding water as needed to thin to desired consistency. Season to taste. Garnish with confectioners sugar to serve.

To Assemble: Fill crepes with a large spoonful of the filling and serve with a drizzle of melted peanut butter.

I had a little trouble making the melted peanut butter drizzle so I just added a good sized dollop to to the bananas foster and let the warmth melt it. I would definitely recommend making this with a partner! The crepes are a bit labor intensive and require constant attention. So Patrick was handling the crepes while I was working on the bananas foster. When we make it again we will definitely make the crepe batter the night before (as Mario recommended) if for no other reason than breakfast will come together so much quicker than having to let the batter rest.

I even let Patrick light the rum on fire...

Ricotta Pancakes

Every now and then Patrick and I will have a pasta dish that calls for ricotta. Like manicotti, lasagna, and/or ravioli. Typically the second half of the ricotta container goes bad because we don't use it again. I finally decided to put an end to wasting ricotta and found another recipe for it! I used the ricotta for brunch -- pancakes to be exact! Read on for the recipe!

Ricotta Pancakes from thekitchn.com
   Serves 6
Ingredients
1 cup ricotta cheese
3/4 cup flour
1/2 teaspoon baking powder
1 1/2 tablespoons sugar
pinch salt
3/4 cup milk
3 eggs, divided
1/2 teaspoon vanilla
   We halved the recipe!
Directions
   Set ricotta in a fine mesh strainer about 30 minutes before you start cooking, to drain off excess liquid.
   Whisk together flour, baking powder, sugar, and salt in a bowl. Combine ricotta, milk, egg yolks, and vanilla in a separate bowl.
   Beat the egg whites in an electric mixer until stiff. Add the dry ingredients to the ricotta and milk mixture, stirring gently until just combined. Whisk in a small amount of the egg whites to lighten the batter, then fold in the remaining whites.
   Heat a griddle over medium-high heat, and brush the surface with butter. Use a ladle or measuring scoop (we used a 1/3 cup measure) to pour batter onto the griddle. Cook pancakes for about 3 or 4 minutes, then flip, cooking until both sides are golden brown.

We served with Greek vanilla yogurt and bananas sprinkled with cinnamon. Warmed honey was then drizzled over the dish.